Introduction
Our APIs are styled as REST and return JSON-encoded responses with standard HTTP response codes. AppXite develops APIs to support various integrations, and allow users and applications to access platform data and interact with the platform programmatically. The following HTTP methods are used to access the API resources: GET, POST, PUT, and DELETE.
If you want to use AppXite API on a sandbox platform, please navigate to https://developer.appxite.com/.
Platform release notes will list all of the changes that are introduced by an API version. API version control will use the following format:
Major version releases x.0 (Example 2.0)
Minor version releases: 0.x (Example: 0.3)
Access to APIs
AppXite API Catalog is available for authenticated users only. Please Sign up for the Developer Portal and wait for your account to be activated by AppXite. Once your account is activated, Sign in and navigate to the “API” tab.
All APIs are divided into products that represent different platform functionality.
Channel Management – managing your sellers (e.g. listing, creating, approving sellers).
Core Resources – general platform functionality.
Product Management – offer and product management functions.
Click on the Product you need. To start using the APIs included in the Product you need to create a product subscription.
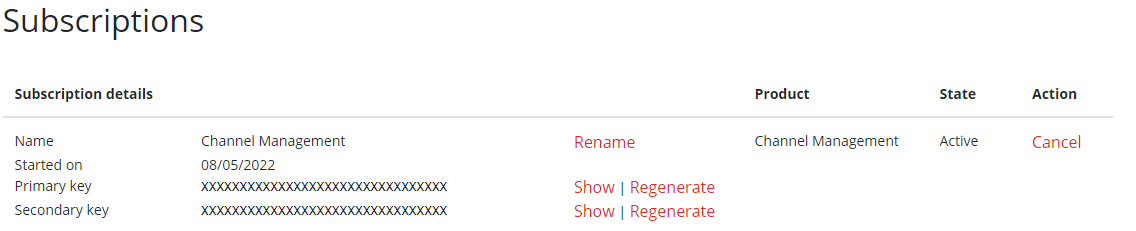
Once a subscription is created it will be in visible in the "User Profile" tab. Upon creation, the subscription will be in the "Submitted" state. AppXite will validate your account and activate that subscription for you.
Please Note that if you are using APIs outside AppXite Developer Portal, please include subscription key as "Ocp-Apim-Subscription-Key" Header.
Authentication
For authenticating requests AppXite APIs use Subscription Key and Bearer Token.
Subscription key is generated upon Product subscription and if used outside AppXite Developer Portal, must be included as "Ocp-Apim-Subscription-Key" Header
The Bearer Token is generated as follows:
Method 1: Generating Bearer Token through API Management
- Step 1: Try the API for which you want Bearer Token to be generated

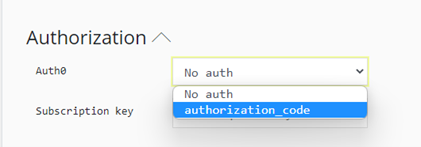
- Step 2: Select the authorization code:
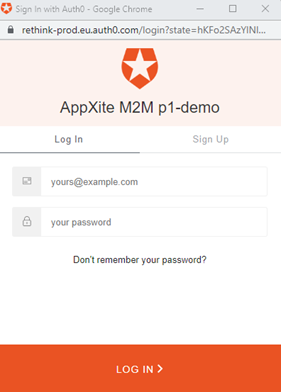
- Step 3: Authenticate with your platform user credentials:
- Step 4: Bearer Token will be generated in the Authorization section under Headers:

Method 2: Generating Bearer Token through client credentials
Step 1: Request client ID and client secret by contacting api@appxite.com.
Step 2: Use your client ID and client secret to make the following API call:
Method: POST
URL: https://rethink-prod.eu.auth0.com/oauth/token
Body (JSON):
{"client_id":"XXXXXXXXXXXXXXX",
"client_secret":"XXXXXXXXXXXXX",
"audience":"https://rethink.atea.com",
"grant_type":"client_credentials"}
Response:
{
"access_token": "XXXXXXXXXXXXX",
"scope": "Platform=",
"expires_in": 86400,
"token_type": "Bearer"
}
Use your access token for API authentication
Status Codes
AppXite is using HTTP response codes for successful or failed API requests. Codes in 2xx range indicate successful requests, whereas codes in the 4xx range indicate failed requests. Error messages will contain detailed information on the cause of the error.
200 - OK: Request is successful and response will be returned to the requester.
500 – Internal Server Error: API call was done correctly, but there is an issue on AppXite’s end.
403 - Forbidden: API call done correctly, but authorization used for call lacks needed permissions to make such API call.
400 – Bad Request: The API request was unacceptable, typically due to missing a required parameter.
404 – Not Found: There is a mistake in API call, such API which is queried doesn’t exist.
401 - Unauthorized: Authorization has been denied for this request. Token is likely expired.
408 – Requested Timeout: Server failed to receive a complete request within allotted timeout period.
429 – Too Many Requests:Too many requests were sent for the same API.